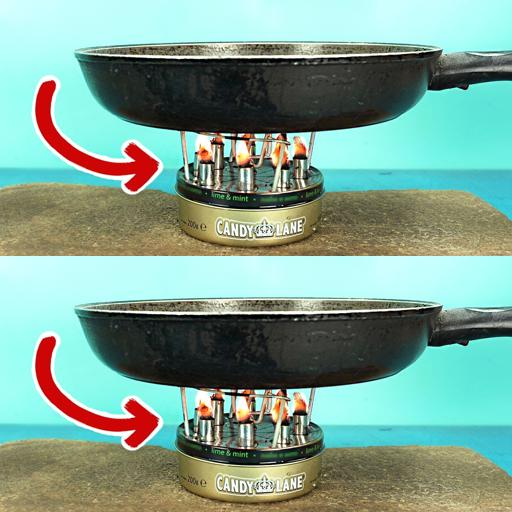
Fuel Savings Made Easy: DIY Oil Stove for Green Cooking – Eco-Friendly and Long-Lasting Power!
Are you looking for a sustainable and budget-friendly way to cook your meals? Creating a DIY oil stove could be the perfect solution for you. Not only is it eco-friendly, but it also offers long-lasting power, making it a practical choice for off-grid living or outdoor adventures. Let’s explore how you can easily construct your own oil stove and start enjoying fuel savings while cooking delicious meals.
Materials Needed
- A tin can (such as a large coffee can)
- An empty smaller tin can (like a soup can)
- Insulation material (such as vermiculite or sand)
- Cotton wick or improvised wick material
- Vegetable oil or any other clean-burning oil
- Matches or a lighter
Steps to Build Your Oil Stove
- Prepare the Tin Cans: Clean the tin cans thoroughly and remove any labels or adhesive residue. The large can will serve as the base of your stove, while the smaller can will hold the oil and wick.
- Create Openings: Using a can opener or a sharp knife, make a series of small holes around the top rim of the large can. This will allow oxygen to flow into the stove and promote combustion.
- Fill the Large Can: Fill the bottom of the large can with a layer of insulation material, like vermiculite or sand. This will help retain heat and keep the stove stable during use.
- Prepare the Wick: Cut a piece of cotton wick or other suitable material to the desired length, ensuring it fits inside the smaller can with some length protruding above the rim.
- Assemble the Oil Stove: Place the smaller can in the center of the large can, on top of the insulation material. Fill the smaller can with vegetable oil or your chosen fuel, ensuring the wick is saturated.
- Ignite the Wick: Light the wick with matches or a lighter, allowing it to burn for a few minutes until a steady flame is established. Adjust the wick length as needed to control the flame intensity.
Benefits of Using an Oil Stove
- Eco-Friendly: Oil stoves produce minimal emissions compared to traditional wood-burning stoves, making them a cleaner cooking alternative.
- Cost-Effective: Vegetable oil is a readily available and affordable fuel source, offering significant savings compared to buying wood or charcoal for cooking.
- Portable and Versatile: DIY oil stoves are lightweight and easy to transport, making them ideal for camping trips, picnics, or emergency preparedness.
- Long-Lasting Power: When properly maintained, an oil stove can provide hours of cooking time on a single fill, reducing the need for frequent refueling.
Safety Precautions
- Use in Well-Ventilated Areas: Always operate the oil stove in a well-ventilated space to prevent the build-up of carbon monoxide and other harmful gases.
- Keep Flammable Materials Away: Make sure to place the stove on a stable surface away from curtains, paper, or other flammable objects that could catch fire.
- Monitor the Flame: Never leave the oil stove unattended while lit and always keep an eye on the flame to prevent accidents or spills.
By following these simple steps, you can create your own DIY oil stove for green cooking and enjoy the benefits of eco-friendly and long-lasting power. Whether you’re looking to reduce your carbon footprint, save money on fuel costs, or simply enjoy the convenience of a portable cooking solution, an oil stove is a practical and sustainable choice for your cooking needs.


